


Mastering the Art of Portrait Photography: Essential Tips for Capturing Stunning Portraits
Portrait photography is a captivating art form that allows us to capture the essence and beauty of individuals. Whether you’re a professional photographer or an enthusiast with a passion for capturing captivating portraits, having a solid foundation of skills and techniques is essential. In this article, we will delve into the world of portrait photography and provide you with valuable tips and insights to elevate your skills and capture breathtaking portraits. From composition and lighting to posing and post-processing, let’s explore the secrets behind taking great portrait photos.
Essential Equipment for Mastering the Art of Portrait Photography
Taking great portrait photos
In this section, we will discuss the fundamental equipment required to capture stunning portrait photos. From cameras and lenses to lighting equipment and accessories, having the right gear is crucial for achieving professional results.
1. Camera
Invest in a camera with manual controls and interchangeable lenses. DSLRs (Digital Single-Lens Reflex) and mirrorless cameras are popular choices among photographers for their versatility and image quality. Ensure your camera has a suitable sensor size and resolution for capturing detailed portraits.
2. Lenses
Choose lenses that are well-suited for portrait photography. A prime lens with a focal length between 50mm and 85mm is ideal for capturing flattering portraits with a natural perspective. These lenses offer a wide aperture, allowing you to achieve a shallow depth of field and beautiful background blur (bokeh).
3. Tripod
A sturdy tripod is invaluable for keeping your camera steady and capturing sharp images, particularly in low-light situations or when using slower shutter speeds. It allows for precise composition and eliminates camera shake, resulting in sharper portraits.
4. Lighting Equipment:
While natural light can be wonderful for portraits, having control over lighting is essential for consistent results. Consider investing in external flashes or continuous lights, along with light modifiers like softboxes or umbrellas, to shape and control the light. Reflectors are also useful for bouncing and diffusing light.
5. Memory Cards and Batteries:
Ensure you have ample memory card storage to accommodate a large number of high-resolution images. Carry extra fully-charged batteries to avoid running out of power during extended photoshoots.
6. Accessories:
Accessories that will help Mastering the Art of Portrait Photography
Additional accessories like lens filters (e.g., polarizing or neutral density filters), a remote shutter release for self-portraits or group shots, and a comfortable camera bag for carrying your equipment are worth considering.
Remember, while having quality equipment can enhance your photography, it’s the skills and techniques that truly make a difference. Invest in gear that suits your budget and needs, and focus on developing your skills and creativity to capture stunning portraits.
By having the right equipment at your disposal, you’ll be well-prepared to explore the world of portrait photography and capture memorable images that truly showcase the beauty and essence of your subjects.
Portrait photography techniques
Mastering Composition Techniques, Composition in Portrait Photography.

Composition is a fundamental aspect of portrait photography that can significantly impact the visual impact and storytelling of your images. Here, we will explore essential composition techniques to help you create compelling and visually appealing portraits.
Rule of Thirds:
The rule of thirds is a basic guideline that involves dividing your frame into a 3×3 grid. Position the subject’s key elements along these gridlines or at their intersections to create a balanced and visually pleasing composition. This technique adds interest and guides the viewer’s eyes through the image.
Leading Lines:
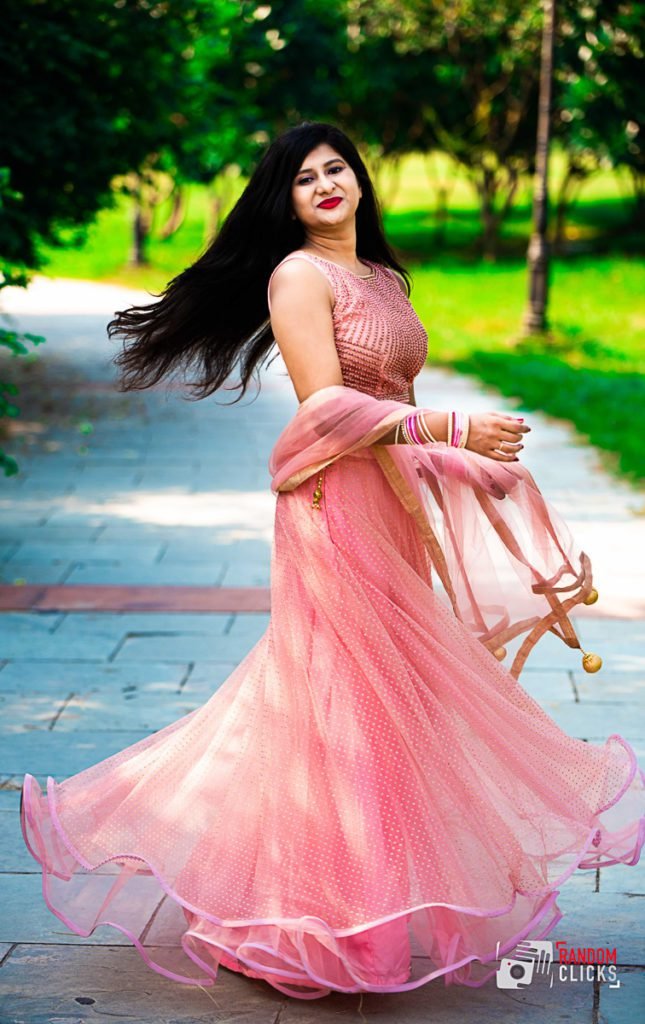
Utilise leading lines to draw attention to your subject. These lines can be literal (such as a road or a path) or implied (like the shape of a hand or the curve of a body). Leading lines create depth and guide the viewer’s gaze towards the main subject, making the composition more dynamic.
Framing:
Incorporate elements in the environment to frame your subject. This could be natural elements like archways, trees, or windows, or artificial objects like doorways or fences. Framing adds depth, context, and visual interest to your portraits, drawing attention to the subject and creating a sense of storytelling.
Negative Space:
Don’t be afraid of empty space in your compositions. Negative space refers to the areas around your subject that are devoid of detail or background. This technique helps to emphasize the subject, evoke emotions, and create a sense of simplicity and elegance.
Symmetry and Patterns:
Symmetry and patterns can be powerful compositional elements in portrait photography. Seek out symmetrical environments or use reflections to create harmonious and balanced compositions. Similarly, patterns in the environment or on clothing can add visual interest and repetition, enhancing the overall composition.
Background Considerations:
Pay attention to the background when composing your portraits. Look for clean, uncluttered backgrounds that don’t distract from the subject. Consider using a wide aperture to blur the background (shallow depth of field) and isolate the subject, ensuring they stand out prominently.
Experiment with Perspectives:
Don’t be afraid to experiment with different angles and perspectives to add a unique twist to your portraits. Get low to the ground or shoot from a higher vantage point for a fresh perspective. Breaking away from eye-level shots can create more dynamic and engaging compositions.
Remember that composition techniques are guidelines, and there’s room for creativity and experimentation. Develop your own style and adapt these techniques to suit your subjects and the story you want to tell through your portraits. Practice observing the environment and training your eye to see potential compositions before pressing the shutter button.
By mastering composition techniques, you can create visually striking portraits that captivate viewers and convey the intended mood and message of your images.
Understanding Lighting for Portraits
Mastering the Art of Portrait Photography
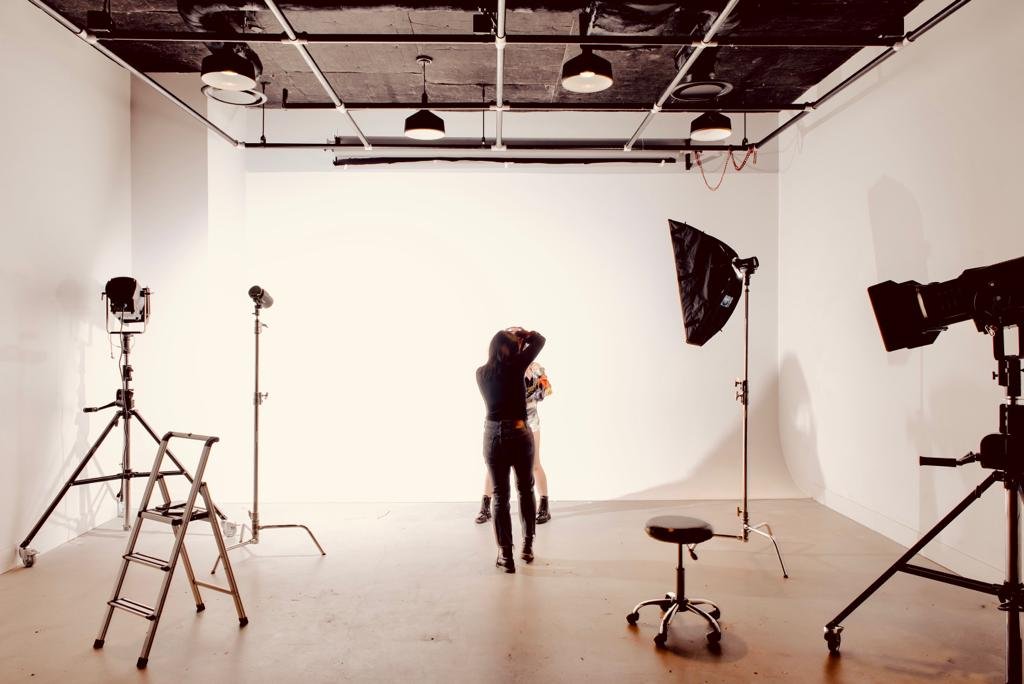
Photo by Harrison Haines: https://www.pexels.com/photo/professional-photographer-during-photo-shoot-in-studio-3800848/
Lighting for Portraits
Lighting is a crucial element in portrait photography, as it can greatly influence the mood, atmosphere, and overall quality of your images. Here, we will delve into different lighting techniques and considerations to help you create stunningly lit portraits.
Natural Light:
Utilising natural light can produce beautiful and flattering portraits. Pay attention to the quality and direction of the sunlight. During the golden hour (the hour after sunrise and before sunset), the soft and warm light can add a magical touch to your portraits. Position your subject facing the light source or utilize backlighting for a more dramatic effect.
Artificial Light:
Artificial lighting, such as external flashes or studio strobes, offers more control over the lighting conditions. Experiment with different lighting setups, such as one light setup (key light), two light setups (key light and fill light), or more complex setups (including background lights or hair lights). Adjust the intensity, direction, and modifiers of the light to shape and sculpt the subject’s features.
Soft Light vs. Hard Light:
Soft light produces smooth and even illumination, minimizing harsh shadows and creating a flattering look. Use diffusers or shoot during overcast conditions to achieve soft light. On the other hand, hard light creates strong, defined shadows and can be used to add drama and contrast to your portraits. Direct sunlight or focused artificial light sources can create hard light.
Light Modifiers:
Light modifiers, such as softboxes, umbrellas, and reflectors, help control the quality and direction of the light. Softboxes and umbrellas diffuse the light, creating a larger light source and producing soft, flattering illumination. Reflectors bounce light back onto the subject, filling in shadows and enhancing overall illumination.
Fill Light:
In portrait photography, fill light is used to balance out the shadows created by the main light source (key light). It helps to minimize harsh shadows and create more even lighting on the subject’s face. Fill light can be achieved using a reflector, a secondary light source, or by utilizing natural light bouncing off nearby surfaces.
Consider Ambient Light:
When working with artificial lighting, be mindful of the ambient light in the environment. Balance the artificial light with the existing light sources to create a natural-looking composition. This ensures that the subject blends seamlessly with the surroundings and avoids any unnatural color casts or inconsistencies.
Experiment with Creative Lighting:
Don’t be afraid to experiment and think outside the box when it comes to lighting. Explore techniques like rim lighting (lighting the subject from behind to create a subtle glow around the edges), silhouette portraits, or using colored gels to add a creative and artistic touch to your portraits.
Continuous Lighting vs. Flash:
Continuous lighting provides a constant light source, making it easier to visualize the final result and adjust accordingly. It works well for beginners and when shooting video. On the other hand, flash photography offers more power and versatility, especially for outdoor or studio setups.
Remember to observe and analyze how light interacts with your subject and surroundings. Understand the mood you want to convey and adapt your lighting techniques accordingly. Continuously experiment with different lighting setups to develop your own style and create visually captivating portraits.
By mastering lighting techniques, you can enhance the mood, highlight your subject’s features, and create stunning portraits that truly come to life.
Posing and Directing Your Subjects
Posing and directing your subjects is a crucial aspect of portrait photography. It allows you to create a connection, capture their personality, and showcase their best features. In this section, we will explore posing techniques and provide tips on how to effectively direct your subjects for compelling and natural-looking portraits.
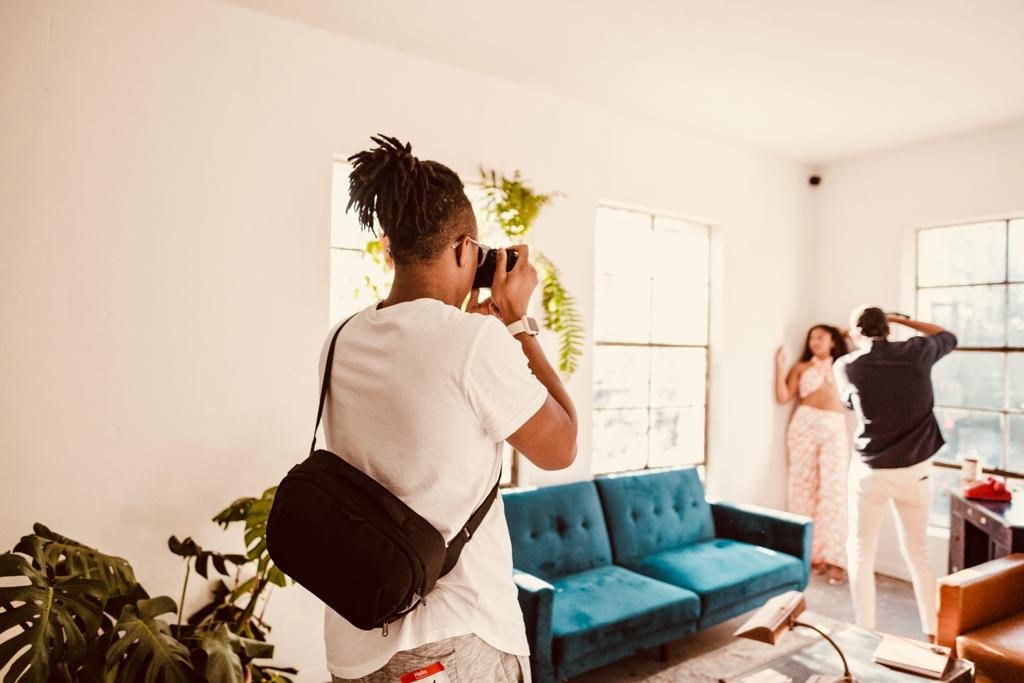
Photo by Airam Dato-on: https://www.pexels.com/photo/fashion-photographers-taking-photos-of-woman-model-11627675/
Communicate and Build Rapport:
Establishing good communication and building rapport with your subjects is essential for creating a comfortable and relaxed atmosphere. Take the time to talk to them, understand their preferences, and make them feel at ease. This will help them open up and express themselves naturally in front of the camera.
Body Language and Facial Expressions:
Guide your subjects on how to position their body and convey appropriate facial expressions. Encourage them to relax their shoulders, stand tall, and avoid stiff or unnatural poses. For facial expressions, suggest emotions or thoughts that match the mood you want to convey in the portrait. Keep an eye on small details like relaxed hands, gentle smiles, or genuine laughter.
Find Flattering Angles:
Experiment with different angles to find the most flattering perspectives for your subjects. Avoid shooting from below, as it can create unflattering double chins or distort facial features. Instead, shoot from slightly above or at eye level for a more pleasing and natural look. Also, consider the subject’s body type and guide them towards poses that highlight their best features.
Use Props and Environment:

Incorporating props or utilising the environment creatively can add interest and depth to your portraits. Props can help your subjects feel more at ease and give them something to interact with. For example, a bouquet of flowers, a musical instrument, or a chair can be used to create engaging compositions. Additionally, consider how the environment can complement or enhance the story you want to tell through your portraits.
Guide Posture and Weight Distribution:
Pay attention to your subject’s posture and weight distribution to achieve balanced and pleasing poses. Encourage them to shift their weight from one leg to the other, creating a more dynamic and relaxed stance. Guide them to keep their backs straight and their chin slightly extended to avoid slouching.
Embrace Natural Movements:
Encourage your subjects to move naturally during the photoshoot. Ask them to walk, dance, or interact with their surroundings. Candid moments and spontaneous movements often result in more authentic and captivating portraits.
Capture Genuine Emotions:
The key to compelling portraits is capturing genuine emotions. Create a comfortable and enjoyable environment that allows your subjects to express themselves naturally. Engage them in conversations, tell jokes, or play their favorite music to evoke authentic emotions that reflect their personality and story.
Use Posing Prompts and Inspirational References:
Provide posing prompts or reference images to help your subjects understand the desired mood or pose. You can show them sample poses, mood boards, or even ask them to imitate poses from famous portraits. This can serve as inspiration and guide them in creating captivating and unique poses.
Remember, every subject is unique, and what works for one person may not work for another. Adapt your posing and directing techniques to suit each individual, considering their comfort level and personal style. The goal is to capture their essence and showcase their true personality through the portraits.
By effectively posing and directing your subjects, you can create compelling and authentic portraits that resonate with viewers and tell a story.
Utilising Depth of Field and Focus

Understanding and effectively using depth of field and focus in portrait photography can greatly enhance the visual impact and storytelling of your images specially in wedding photography. In this section, we will explore techniques and tips for utilizing depth of field and focus to create captivating portraits.
Aperture Selection:
The aperture setting determines the depth of field in your portraits. A wider aperture (smaller f-number, such as f/1.8) creates a shallow depth of field, where the subject is in sharp focus while the background appears blurred. This technique is often used to isolate the subject and draw attention to their features. On the other hand, a narrower aperture (larger f-number, such as f/8 or higher) increases the depth of field, resulting in more of the scene being in focus. Choose the appropriate aperture based on the desired effect and the story you want to convey.
Focusing on the Eyes:
The eyes are the windows to the soul and often the focal point of a portrait. Ensure that the eyes are in sharp focus, as this brings a sense of connection and draws the viewer’s attention. Use the autofocus feature on your camera or manually focus on the eyes to ensure clarity and sharpness. If using a wide aperture, focus carefully to avoid focusing on the eyelashes or other parts of the face.
Selective Focus:
Consider using selective focus to highlight specific elements in your portraits. This technique involves intentionally blurring certain parts of the image while keeping the subject or a particular area in sharp focus. Experiment with different compositions and focal points to create visually compelling and dynamic portraits.
Background Blur:
Blurring the background can help separate the subject from the surroundings and create a pleasing aesthetic. This effect, also known as bokeh, can be achieved by using a wide aperture and positioning the subject at a significant distance from the background. Pay attention to the distance between the subject and the background to control the amount of blur and maintain a smooth and creamy bokeh.
Focus Stacking:
In situations where you want to achieve a large depth of field, such as capturing a group portrait or a landscape background, consider using focus stacking. This technique involves capturing multiple images at different focal distances and later merging them in post-processing to achieve a final image where everything appears in focus.
Consider Distance and Perspective:
The distance between the subject, the camera, and the background can significantly affect the depth of field and focus in your portraits. As you move closer to the subject, the depth of field becomes shallower, allowing you to isolate them from the background more effectively. Experiment with different distances and perspectives to create unique and visually engaging portraits.
Utilise Lens Characteristics:
Different lenses have varying depth of field characteristics and bokeh quality. Prime lenses with wider maximum apertures (such as 50mm f/1.4 or 85mm f/1.8) are popular choices for portrait photography, as they offer excellent control over depth of field and often produce beautiful bokeh. However, don’t be limited by lens choices – experiment with the lenses you have and understand their strengths and limitations.
Practice and Experiment:
Mastering depth of field and focus techniques requires practice and experimentation. Familiarize yourself with your camera’s autofocus modes and learn how to manually focus accurately. Explore different aperture settings and observe the resulting effects on depth of field. Through trial and error, you’ll develop an understanding of how to achieve the desired focus and depth of field for your specific portraits.
By effectively utilizing depth of field and focus, you can create captivating portraits that guide the viewer’s attention, emphasize important elements, and evoke a desired mood or atmosphere. Experiment with different techniques, adapt them to suit your subjects and the
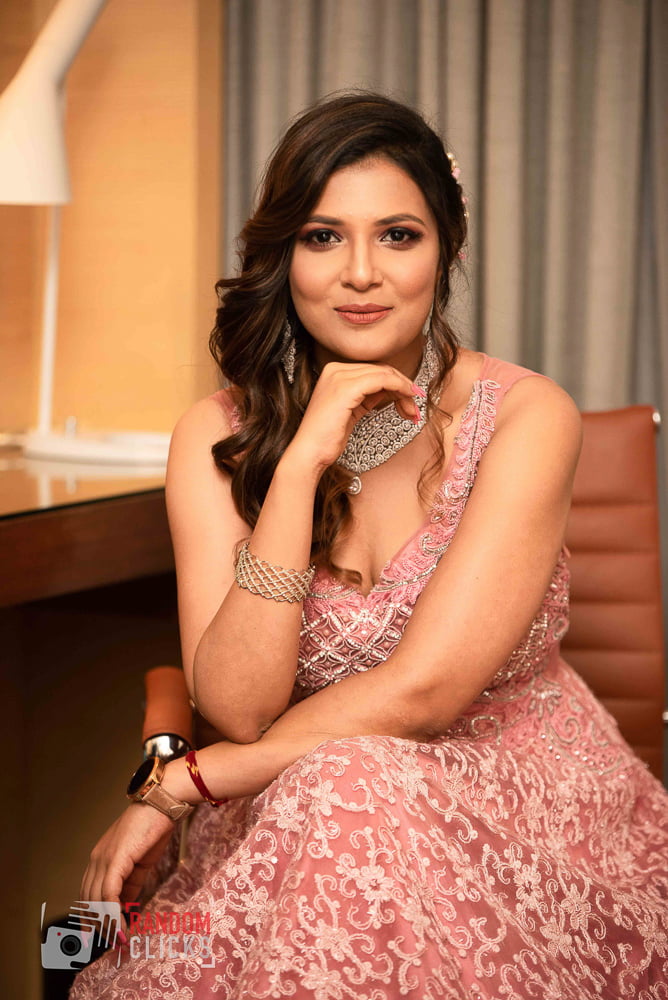
Exploring Creative Techniques and Perspectives for Unique Portraits
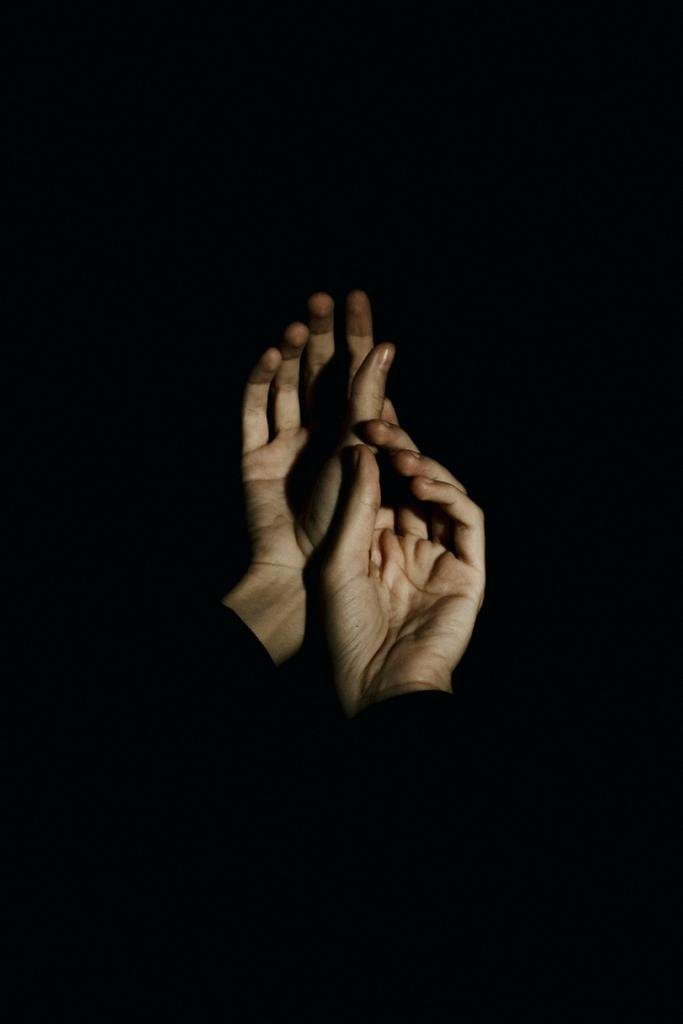
Photo by Kássia Melo: https://www.pexels.com/photo/suave-14447602/
Creating unique and visually captivating portraits goes beyond technical proficiency. It involves exploring creative techniques and perspectives that push the boundaries of traditional portrait photography.
Unconventional Framing:
Break away from traditional composition rules and experiment with unconventional framing techniques. Try incorporating elements in the foreground or using natural frames within the environment to add depth and visual interest to your portraits. By thinking outside the box, you can create compositions that are visually engaging and thought-provoking.
Environmental Portraits:
Instead of isolating the subject, consider incorporating the environment as a storytelling element in your portraits. Environmental portraits capture individuals within their surroundings, providing context and a sense of narrative. Whether it’s a workspace, a natural setting, or an urban landscape, the environment can add depth and personality to your portraits.
Reflections and Mirrors:
Explore the use of reflections and mirrors to create unique perspectives in your portraits. Reflective surfaces, such as glass windows, water bodies, or polished surfaces, can add visual interest and create intriguing compositions. Experiment with positioning your subject near reflective surfaces and play with the angles to capture captivating reflections.
Silhouettes:
Silhouettes can be a powerful and evocative way to capture the essence of your subjects without revealing their facial features. Utilize backlighting to create striking silhouettes, where the subject appears as a dark outline against a brighter background. Silhouettes can convey mood, mystery, and a sense of anonymity, allowing viewers to focus on the shape and form of the subject.
Double Exposures:
Embrace the creative possibilities of double exposures by merging two or more images into one. By blending portraits with textures, patterns, or landscapes, you can create ethereal and surreal effects. Experiment with different exposure settings and compositions to achieve unique and visually stunning results.
Motion Blur:
Introduce movement into your portraits by intentionally incorporating motion blur. This technique can add a sense of dynamism and energy to your images. Experiment with slower shutter speeds while having your subject move or incorporating intentional camera movement to create artistic and abstract effects.
High and Low Angles:
Change your perspective by exploring high and low angles. Shooting from above can make the subject appear more vulnerable or emphasize certain facial features, while shooting from a low angle can create a sense of power and dominance. Altering the camera’s perspective can bring a fresh and unique look to your portraits.
Conceptual and Fine Art Portraits:
Push the boundaries of traditional portraiture by delving into conceptual or fine art approaches. Tell stories, convey emotions, or explore abstract ideas through your portraits. Experiment with props, costumes, and artistic elements to create visually striking and thought-provoking images.
Remember, creativity is subjective, and what resonates with one viewer may not appeal to another. Embrace your artistic vision and experiment with different techniques and perspectives to develop your unique style. The key is to continually explore and challenge yourself to create portraits that stand out and evoke an emotional response.
By incorporating creative techniques and exploring different perspectives, you can push the boundaries of traditional portrait photography and create visually captivating and unique portraits that leave a lasting impression on viewers.
Post-processing and Retouching Tips

Post-processing is an essential step in the portrait photography workflow that allows you to enhance the visual impact and polish your images.
Sorting and Selecting:
Start by reviewing and sorting your images to identify the best shots. Look for images with the best composition, sharp focus, and captivating expressions. Narrow down your selection to a manageable number before moving on to the editing process.
White Balance Adjustment:
Adjust the white balance to ensure accurate and pleasing colors in your portraits. You can use either the auto white balance setting or manually adjust the temperature and tint sliders to achieve the desired look. Consider the lighting conditions during the shoot and the mood you want to convey in the final image.
Exposure and Contrast Adjustment:
Fine-tune the exposure and contrast of your portraits to achieve the desired tonal range and mood. Adjust the exposure slider to control the overall brightness, and use the contrast slider to enhance the distinction between light and dark areas. Be careful not to overexpose or underexpose the image, and aim for a balanced and natural-looking result.
Color Correction and Enhancement:
Enhance the colors in your portraits by adjusting the saturation and vibrancy sliders. Use selective color adjustments to fine-tune specific hues or color ranges. Consider the skin tones and make subtle adjustments to ensure a natural and flattering appearance.
Retouching and Blemish Removal:
Retouching can help enhance the appearance of your subjects while maintaining a natural look. Use tools like the healing brush or clone stamp to remove blemishes, wrinkles, or distractions. Be mindful of not overdoing it, as excessive retouching can result in an artificial and unrealistic outcome.
Sharpening and Noise Reduction:
Apply sharpening techniques to enhance the details and make your portraits appear crisp and defined. Use selective sharpening to avoid sharpening areas with skin texture or fine details. Additionally, reduce noise in your images, especially in low-light situations, using noise reduction tools. Strike a balance between noise reduction and maintaining the desired level of detail.
Creative Effects and Styles:
Experiment with creative effects and styles to add a unique touch to your portraits. This can include applying vignettes, adding a soft glow, or converting to black and white for a timeless look. Use presets or create your own custom editing style to maintain consistency across your portrait portfolio.
Save in Appropriate Formats:
Save your edited portraits in appropriate file formats, such as JPEG or TIFF, depending on your intended use. Consider the resolution and compression settings to balance file size and image quality.
Remember, post-processing is a creative tool to enhance your images, but it should not be used to compensate for poor composition or technical mistakes. Strive to capture the best possible image in-camera, and use post-processing as a means to elevate your portraits further.
Develop your own editing style while considering the preferences of your clients or your personal artistic vision. Experiment with different techniques, but aim for a result that showcases the natural beauty and authenticity of your subjects.
By applying effective post-processing techniques, you can elevate your portraits and create visually stunning images that leave a lasting impact on viewers.
Developing Your Own Style in Portrait Photography

Developing your own unique style in portrait photography is a journey of self-expression and creative exploration. It involves honing your technical skills, discovering your artistic vision, and finding a distinct voice that sets you apart from others.
Study and Seek Inspiration:
Begin by studying the work of renowned portrait photographers and other artists who inspire you. Analyze their compositions, lighting techniques, use of colors, and overall aesthetic. Take inspiration from their work but strive to develop your own interpretation and approach. Explore various genres of photography, not just portraits, as they can offer new perspectives and ideas.
Experiment and Explore:
Don’t be afraid to experiment with different techniques, styles, and concepts. Use this experimental phase as an opportunity to push your boundaries, try new approaches, and discover what resonates with you. Explore different lighting setups, compositions, post-processing styles, and subject matter. Embrace the freedom to make mistakes and learn from them along the way.
Find Your Niche:
Consider specializing in a particular niche or subject matter within portrait photography. Whether it’s environmental portraits, fashion photography, conceptual portraits, or documentary-style portraits, finding your niche allows you to focus your skills and develop a recognizable style. It also helps you attract clients who resonate with your specific style and vision.
Embrace Consistency:
Consistency is key to developing a recognizable style. Strive for consistency in your choice of lighting, composition, color palette, and overall mood. This doesn’t mean every portrait should look identical, but there should be a cohesive thread that ties your body of work together. Consistency helps viewers identify your work and builds trust in your artistic vision.
Pay Attention to Post-Processing:
Post-processing plays a crucial role in defining your style. Experiment with different editing techniques, presets, and color grading to create a consistent look and feel across your portraits. Develop a signature editing style that reflects your artistic vision and enhances the mood and narrative of your images. Be mindful of not over-editing and maintaining the natural beauty of your subjects.
Focus on Storytelling:
Use your portraits to tell stories and evoke emotions. Develop the ability to capture the essence of your subjects, their personalities, and the narratives they carry. Pay attention to the details, gestures, and expressions that convey a deeper story. Strive to create images that resonate with viewers on an emotional level and leave a lasting impression.
Be Authentic and True to Yourself:
Developing your own style requires authenticity and staying true to yourself. Let your personal experiences, values, and perspectives influence your work. Avoid copying or imitating others. Instead, find ways to express your unique voice and vision through your portraits. Don’t be afraid to take risks, be different, and embrace your individuality.
Continual Learning and Evolution:
Developing your own style is an ongoing process of learning and evolution. Stay curious, invest time in learning new techniques, and keep up with industry trends. Attend workshops, participate in photography communities, and seek constructive feedback to refine your skills. Embrace feedback as an opportunity for growth and never stop exploring and experimenting.
Remember, developing your own style is a personal and subjective journey. It takes time, dedication, and a willingness to push beyond your comfort zone. Embrace the process, trust your instincts, and allow your style to evolve organically. With persistence and a genuine commitment to your craft, you will develop a unique style that sets you apart in the world of portrait photography.
Taking great portrait photos is a skill that can be honed with practice, patience, and a solid understanding of the essential techniques. By mastering composition, lighting, posing, and post-processing, you can capture portraits that are not only technically impressive but also convey emotion and tell a story. Remember to experiment, push your creative boundaries, and continuously learn and evolve. With these tips and insights, you are well on your way to becoming a skilled portrait photographer capable of capturing stunning and captivating images of people.